Monday, June 19, 2006
Demon canopy painted...
Had my father paint my canopy. He is 80 and got a kick out of me asking. I think he did a good job. Flash from camera makes it look more white than what it does in person. I am getting closer Mike!

Sunday, June 18, 2006
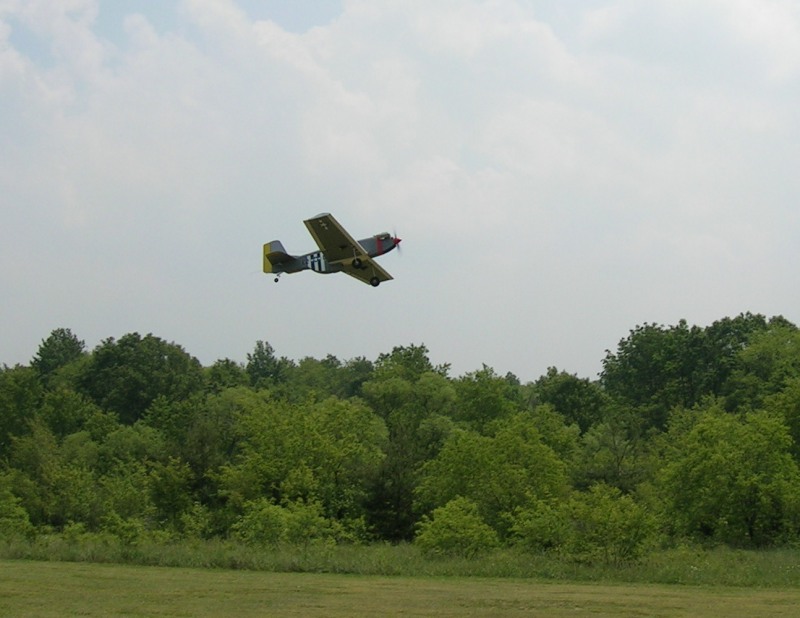
SPADStang videos
And here are links to some video of the SPADStang. These where shot with a digital camera and are not that great. (right click and "save target as" if you want to save them)
First takeoff 3.4mb
Second takeoff 11.2mb
Fly by #1 1.35mb
Fly by #2 1.37mb
Fly over 4.76mb
Final landing 14.5mb
Mike as a pro builder and has done a fantastic job on his SPADStang! I think he said something about the Spitefire next, or was it the Mig 7? Nice work Mike!
First takeoff 3.4mb
Second takeoff 11.2mb
Fly by #1 1.35mb
Fly by #2 1.37mb
Fly over 4.76mb
Final landing 14.5mb
Mike as a pro builder and has done a fantastic job on his SPADStang! I think he said something about the Spitefire next, or was it the Mig 7? Nice work Mike!
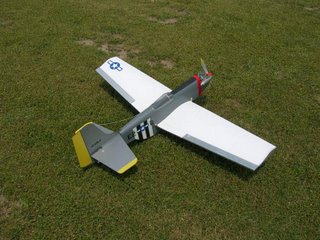
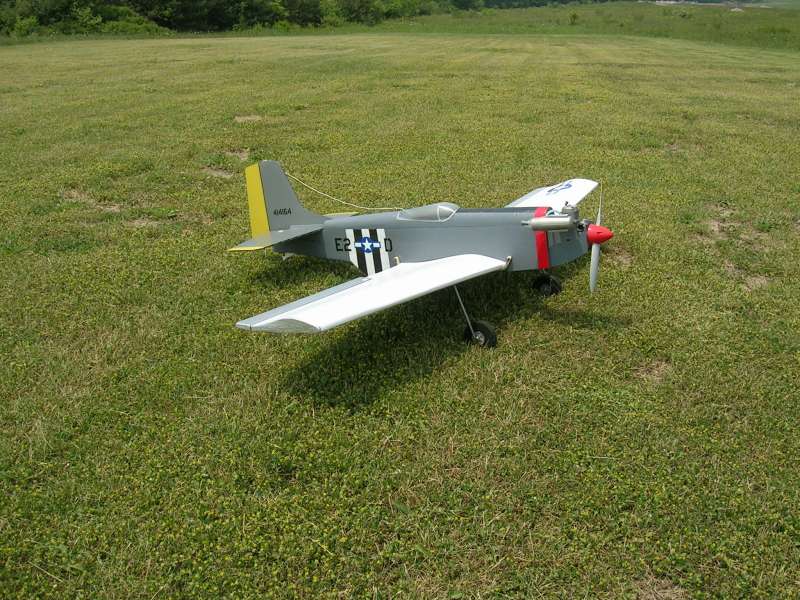
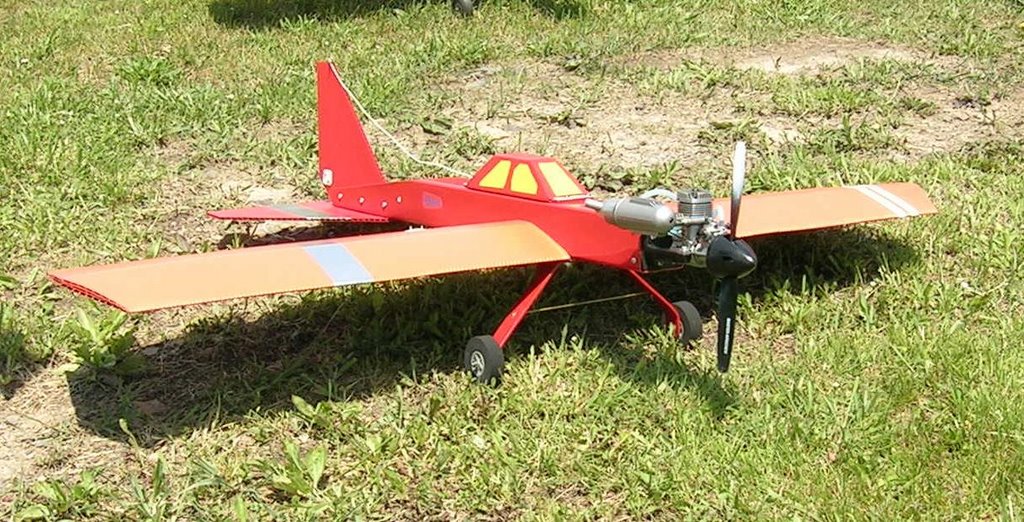
SPADStang
Mike Yanoski from our club built a SPADStang from plans found at spadtothebone. Mike emailed me the following specs...
"Specs, built to the plans on spadtothebone, powered by a OS la 46 with 11x7 prop "
Here are the photos...


"Specs, built to the plans on spadtothebone, powered by a OS la 46 with 11x7 prop "
Here are the photos...


Look at the happy builder/pilot! LOL
Demon update...
Here are a few photos of the blue demon. I have some painting to do on the canopy yet to make it look more like a warplane canopy. Then it is time to install hardware and get this baby flight ready!


Buhor crash update...
Well I am lucky. I stripped out one servo, a very old servo I was using as my throttle. My camera still works!! Case got broke, ejected my memory card on impact, still, all works! Little road rash :) As for the engine, I have not fired it up but I am pretty certain after my inspection and cleaning it up, the ol' 40 should be fine. Got my receiver fixed already, just needs range tested yet. Faired better than I thought I would. :)
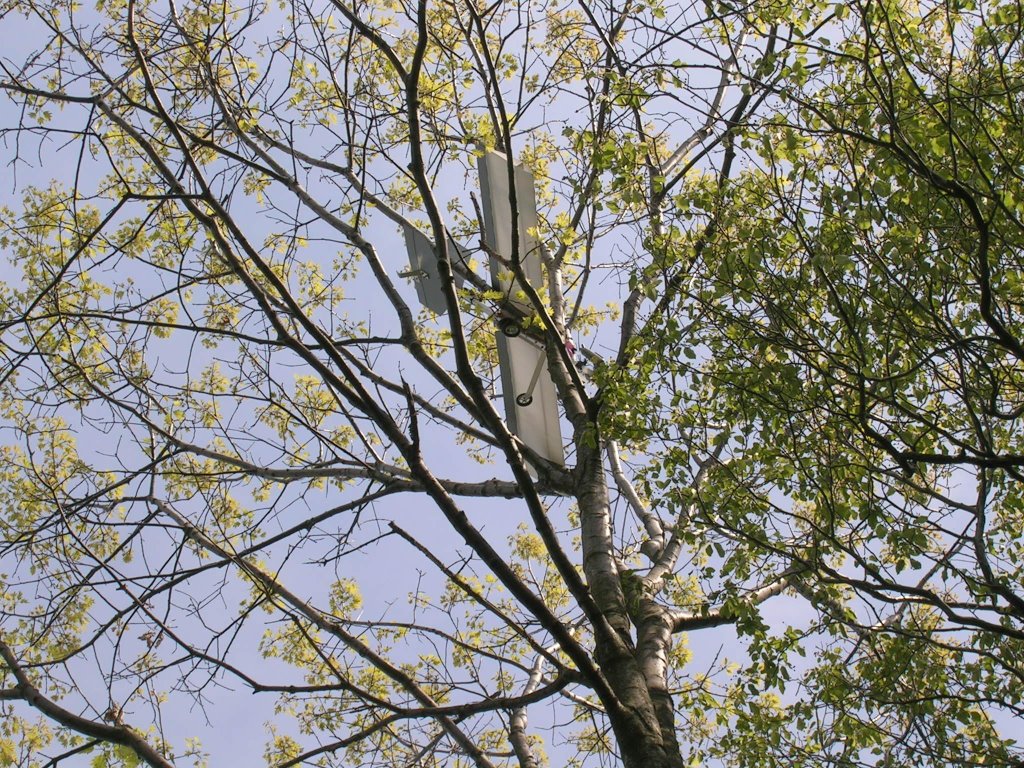
Last flight of the Buhor
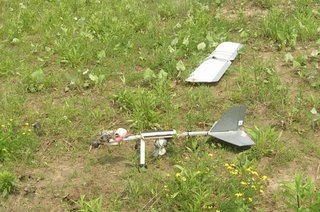
The Buhor 25+ was flying nice Saturday and Sunday. On my 5th flight on Sunday, the nice flying stopped. My Buhor AP plane went lawn dart in from about 300 feet. Broke the prop, bent the fuse, tore the antenna wire from the receiver, bent the landing gear, tore the rudder half off, tore a alerion half off, put a small split in the wing and broke the camera case. Not sure if the servos are ok or not. Have had no time to test them yet. Camera powers on but will not snap a shot. Will check wiring and see if I can correct the problem.
Here are the last photos the Buhor took. Was hazy and hot, but had a great day before the crash :)


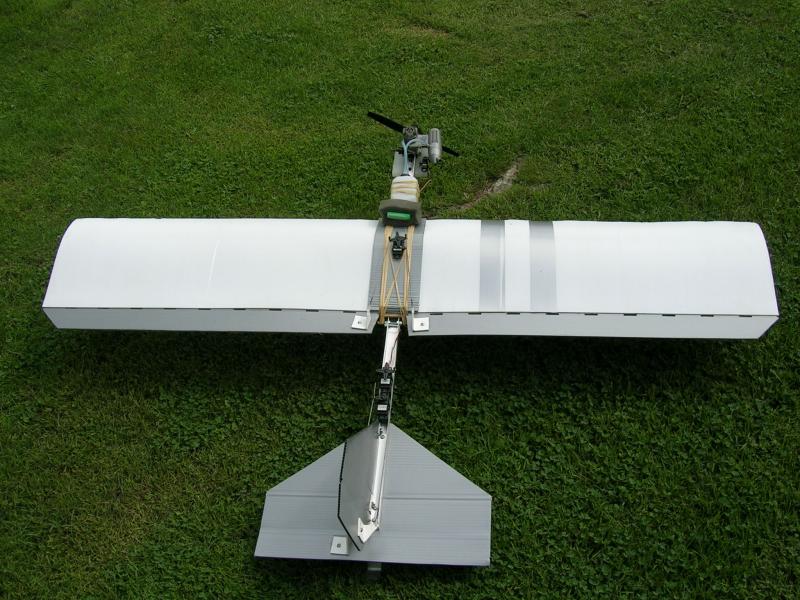
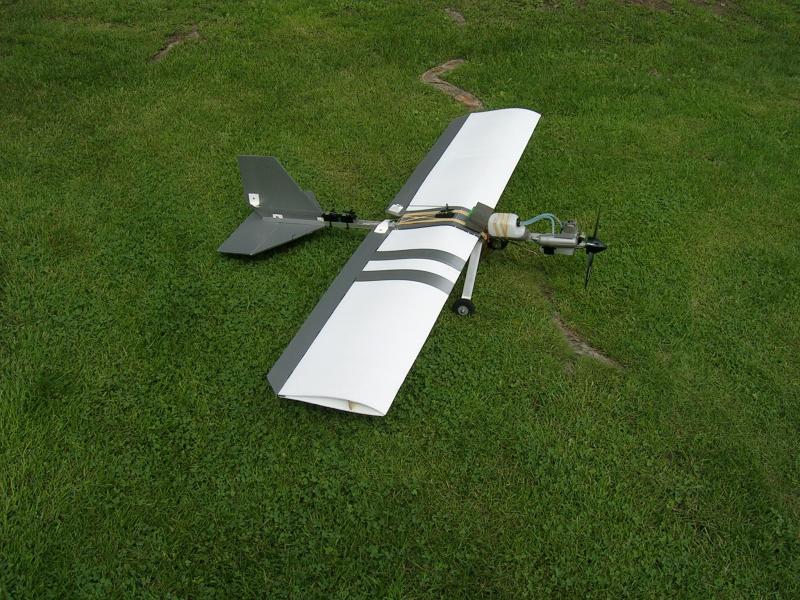
And here is a shot of the plane. Can not see all the damage real well from this photo, but it is there, trust me. I told my buddy Mike that was it for the Buhor. Well, went to lowes and bought a new fuse... sigh, I guess I will rebuild her. Need to cut new tail feathers as well, the ones that was on had some warp. Should have it back up before the weekend.
Here are the last photos the Buhor took. Was hazy and hot, but had a great day before the crash :)

And here is a shot of the plane. Can not see all the damage real well from this photo, but it is there, trust me. I told my buddy Mike that was it for the Buhor. Well, went to lowes and bought a new fuse... sigh, I guess I will rebuild her. Need to cut new tail feathers as well, the ones that was on had some warp. Should have it back up before the weekend.
Friday, June 16, 2006
“The Shark” by Roger Gagnon
Reviewed by Rick Page

My RC flying had been electrics for the last few years. Up until a few months ago my favorite thing to fly was a little 20 inch electric wing from EdgeRC called a Pocket-250. The little thing could do about 60 mph when it was flying at it’s peak.
About 99% of our club flys glow and one guy flys almost all SPAD’s. After seeing his builds and how cool they where, I had to have one. I first built a Buhor 25 from plans I got at spadtothebone this past spring. It is a great trainer and I currently use it as my glow AP platform.
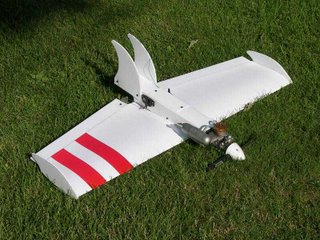
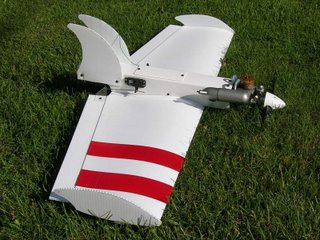
With one SPAD built and flying I had to have another. While searching ebay for engines and parts I happened to do a search for SPAD’s and up popped “The Shark”. A 3 pound coroplast (SPAD) flying wing! Now we are talking! I had just bid on a os max .25 engine and it would work great on the shark!
The shark is sold as an ARF. As I mentioned it weighs in at about 3 pounds. I purchased the 36 inch wingspan version. There is also a 40 inch version. The wing is constructed from 2mm coroplast with 4mm winglets and fins. The center fuselage is made from 2.5 x 2.5 inch plastic downspout. The shark comes with engine mount, fuel tank, firewall with blind nuts and control rods. It comes in a variety of colors, white, yellow, blue, red and grey.
The instructions that came with the Shark amount to one page of text and one page of pictures. Putting together my shark took me about 2 hours (I am rather slow, I think it could be done faster). The text is very straight forward and the photos where a help. I have to say that installing everything was super easy! The CG was spot on with the installed radio gear. The instructions call for 2 – 2 3/8 from the LE. I was at just about 2 1/8th. The wing is balanced inverted with no fuel.
When I installed my elevon control rods I used a straight edge on the bottom of the wing and set my elevons to be level with the bottom. This gave me a slight amount of up elevon. I was ready to try my Shark out.
The big day came and I took my gear and headed to the field. One of the guys was there (the spad guy) to witness my flight. After some engine adjustments I was ready to give her a toss. You hold the Shark by the top of the fuselage and give her full throttle. As recommended you must gave her an underhanded toss out and up. I walked over to the edge of some very tall grass, throttled up and gave her my best toss. The shark dipped ever so slightly and then just climbed like a rocket! Had to give her a few clicks of down and she was flying like an arrow!
Wow is this wing fun! Throws should be set to about ½”. Mine are set a bit larger so she is pretty sensitive. But man is the Shark a blast!
Landings can be pretty hot. She glides fairly well though and I landed her without much trouble. One thing about landing the Shark, there are no landing gears so you must not land under power. Also, set the prop so it goes horizontal when the engine shuts off. Keeps you from breaking them. Mine was a bit off and on my second landing I did break a prop. But that was my own fault and it has not happened since.
I bought a white wing, it gave me a nice blank canvas to put stickers all over, but it also made it dang near invisible at times! Keep in mind that a flying wing has a thin profile and it can be hard to see at times. I need to add some more color to mine! The stripes help but I need a bit more.
To sum up, fantastic! The Shark is well built, tough and flys like it is on rails! Great plane and well worth the money!
The Shark can be found on ebay by searching “Spad Shark”. At the time of this review the 36” is $45 plus shipping and the 40” is $49 plus shipping.
Next thing to do with my Shark, put a 40 or 46 on it! Wow!
I am in no way affiliated with or work for Roger Gagnon. This is an independent review done by me. The opinions expressed in this review are my own.
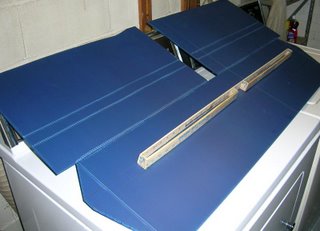
Demon Canopy Build
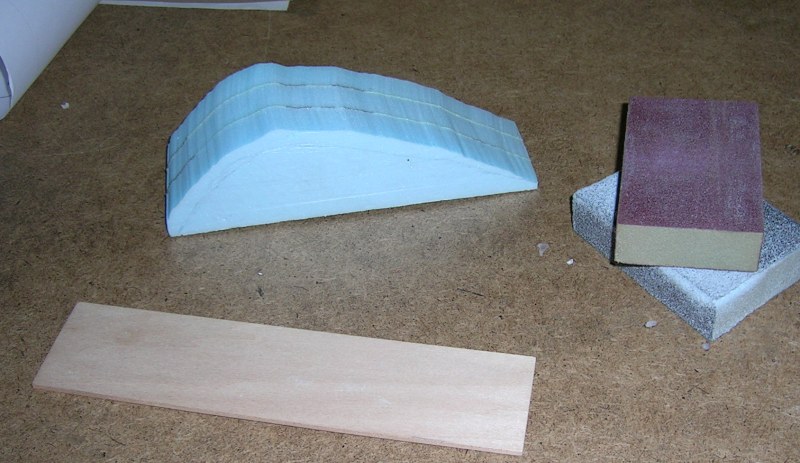
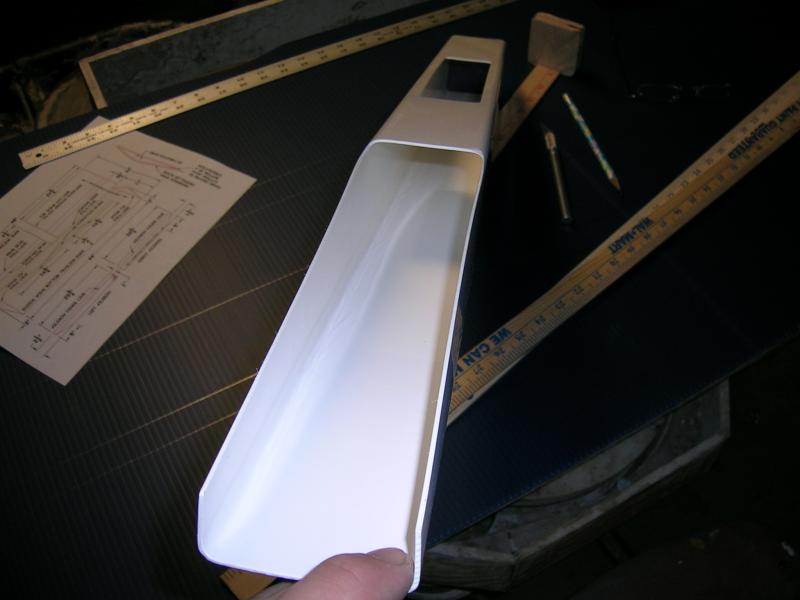
And now the start of the demon canopy. I decided to make the canopy out of foam. I have done a fair amount of foam building in the past and feel pretty comfortable working it into shape.
Here you see the canopy roughed out with a hot wire.

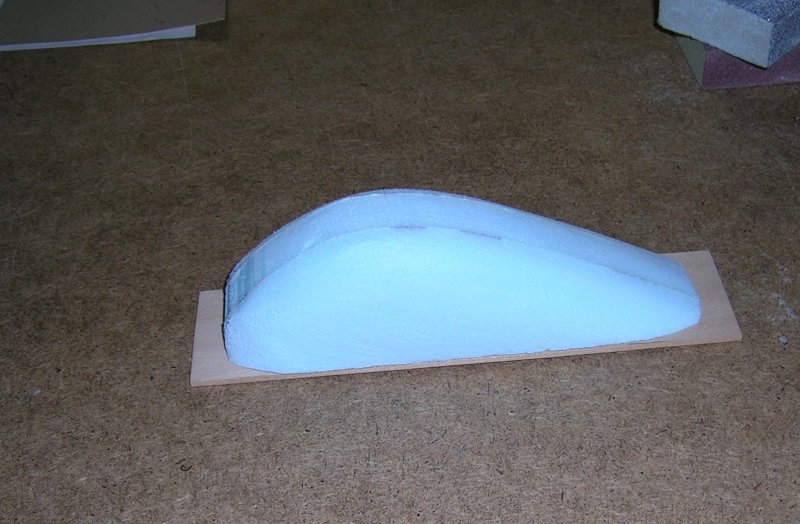
After 5 minutes of sanding with a 3M foam sanding block.

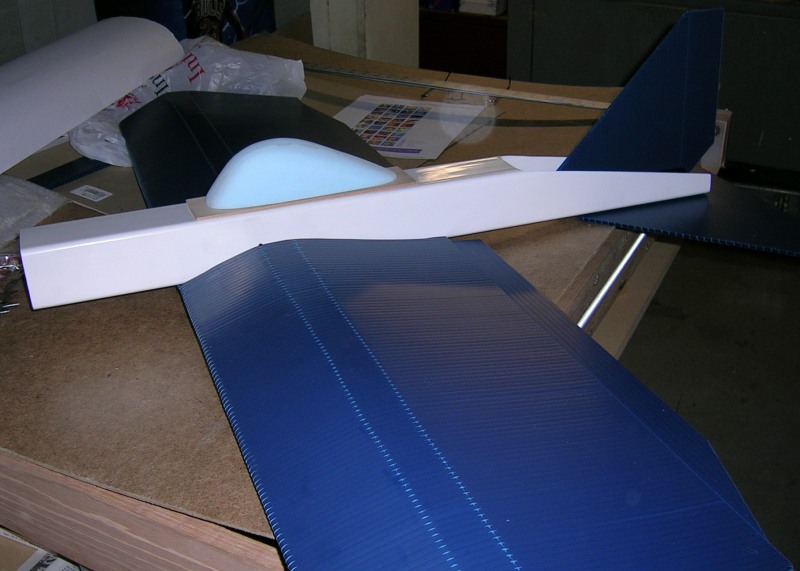
After 30 more minutes of sanding and shaping it is just about what I want. Thought I would see how it looked on the plane.

And to finish the night off I brushed on my first coats of water based polycrylic by MINWAX.
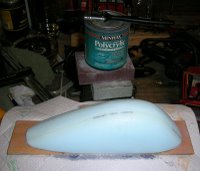
From here I will sand and then apply more polycrylic. I will do this a few times before I prime and paint the canopy. My reason for doing this is two fold. First, I will achieve a nice finish. And second, it will protect the foam from melting when I apply the spray based paint. More photos once I have it primed and painted!
After 5 minutes of sanding with a 3M foam sanding block.
After 30 more minutes of sanding and shaping it is just about what I want. Thought I would see how it looked on the plane.
And to finish the night off I brushed on my first coats of water based polycrylic by MINWAX.

From here I will sand and then apply more polycrylic. I will do this a few times before I prime and paint the canopy. My reason for doing this is two fold. First, I will achieve a nice finish. And second, it will protect the foam from melting when I apply the spray based paint. More photos once I have it primed and painted!
Wednesday, June 14, 2006
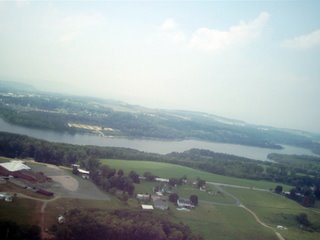
Little more AP today...
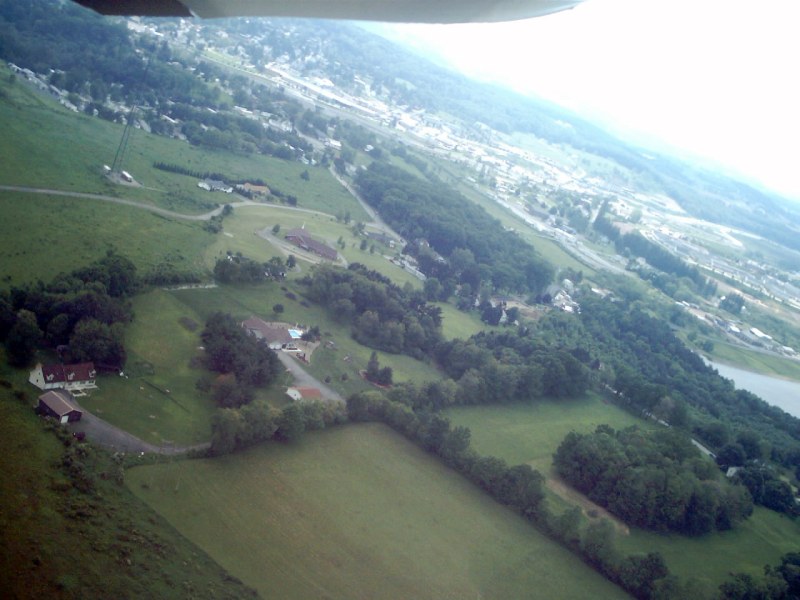
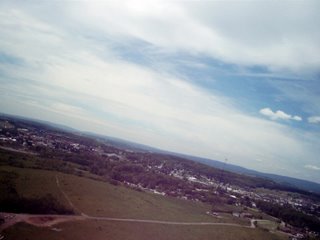
Was a cloudy day and looked like rain. Had some nice flights with the Buhor 25. The camera I am using is not very great and in low light it is really bad. This is one of those bad days. In any case, here is one shot that turned out ok. This is looking west from our field. I adjusted the camera some and now the wing is showing in the shot. Will adjust again next flight and remove that :)
I have a feeling at some point I am going to be using this setup to locate someones downed plane. Having a laptop at the field would allow that to be done.
More on the demon build by the weekend. Thanks for viewing!

I have a feeling at some point I am going to be using this setup to locate someones downed plane. Having a laptop at the field would allow that to be done.
More on the demon build by the weekend. Thanks for viewing!
Tuesday, June 13, 2006
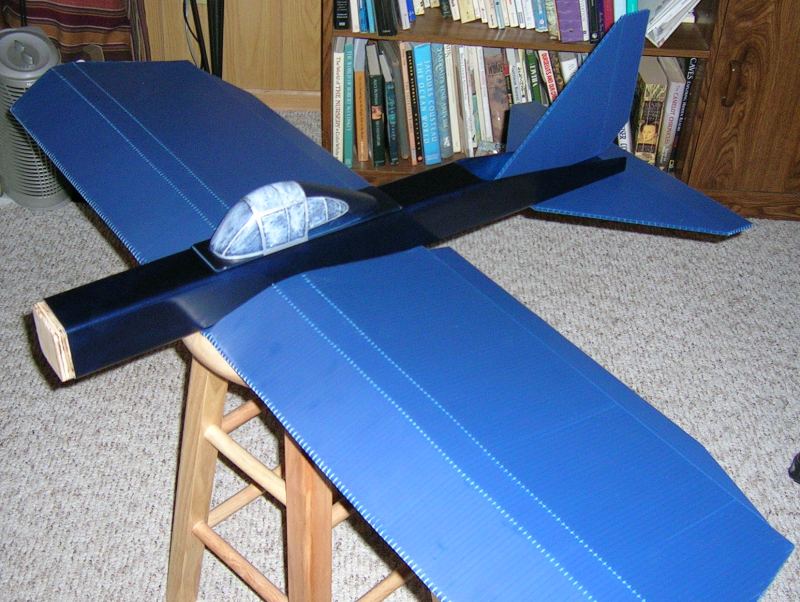
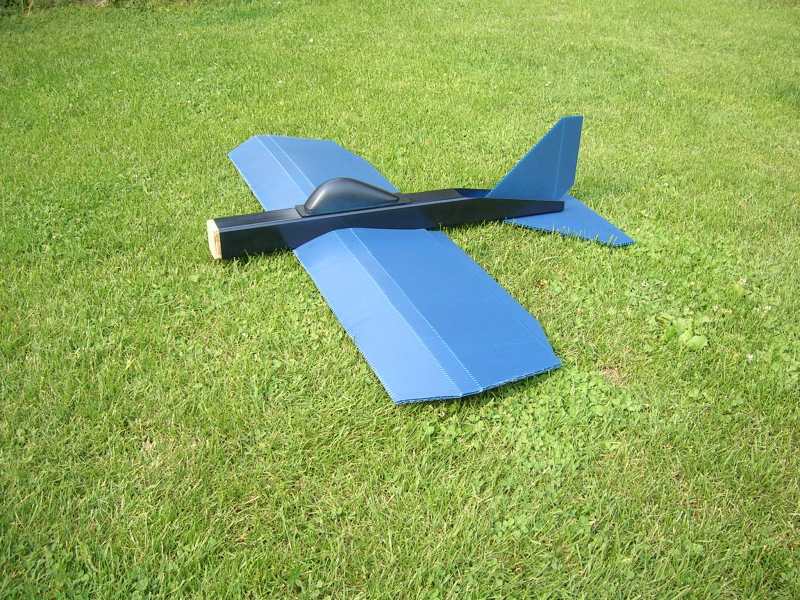
Demon wing almost done!
Well as you can see by the following pictures my demon wing is almost done. Just have to glue up the ends yet, which I will do tonight. Included a shot of the wing with the fuselage. I also have the tail feathers cut (no picture) and I need to make a hatch cover/canopy.
These wings are so simple to make!


These wings are so simple to make!


Sunday, June 11, 2006
Made it to the field today!
Well I made it to the field today and got a few flights in. Took awhile to get the engine tuned right. And I dont think it is right on, but well enough to fly. Here are some of the images I took...
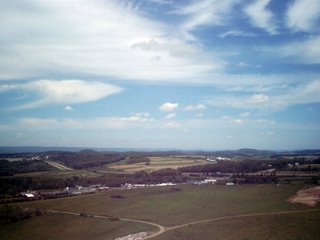
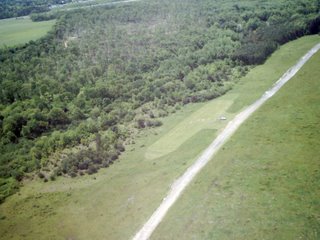
I know that they are sorta boring, but I am excited that I am getting some shots and this SPAD is flying well. Photos of our grass field and a few of Somerset, PA. More to come now that I am back in the flying game!
Should be able to get back to building this week.


I know that they are sorta boring, but I am excited that I am getting some shots and this SPAD is flying well. Photos of our grass field and a few of Somerset, PA. More to come now that I am back in the flying game!
Should be able to get back to building this week.
Wednesday, June 07, 2006
Progress is slow...
I have been rather busy last few days. I did manage however to get my wing folded and the spars glued in place. With some luck I will get the rest of the wing done before the weekend.
My parts shipped today to fix my needle valve on my Buhor! Not being able to fly a Radio Controlled airplane has been driving me nuts! Guess I need to get an electric on standby for these times :) Anyway, with some luck I should have my parts by the weekend.

My parts shipped today to fix my needle valve on my Buhor! Not being able to fly a Radio Controlled airplane has been driving me nuts! Guess I need to get an electric on standby for these times :) Anyway, with some luck I should have my parts by the weekend.
Monday, June 05, 2006
Bummer :(
It would seem when I lawn darted my spad I broke the safety needle valve. Sucks! Oh well, my spad is grounded until I order some parts. We had a storm early this evening, right after it got dead calm! I am bummed...
Sunday, June 04, 2006
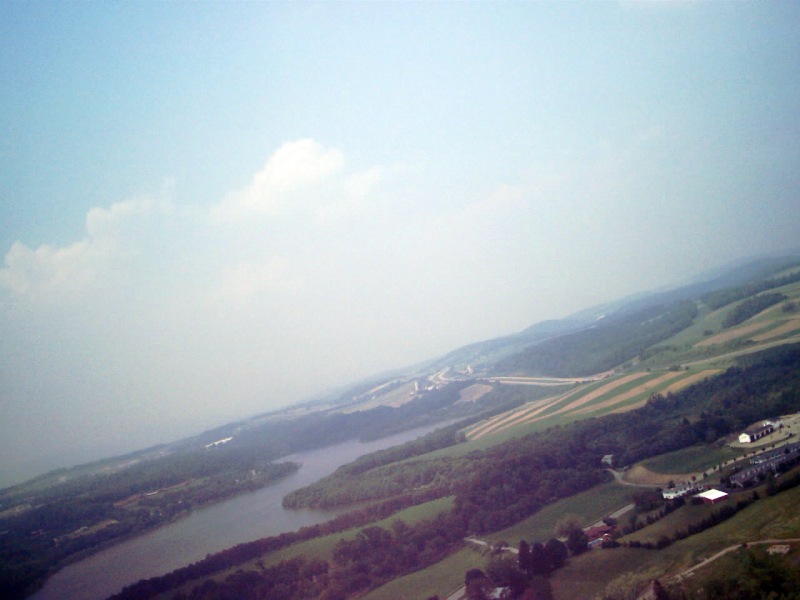
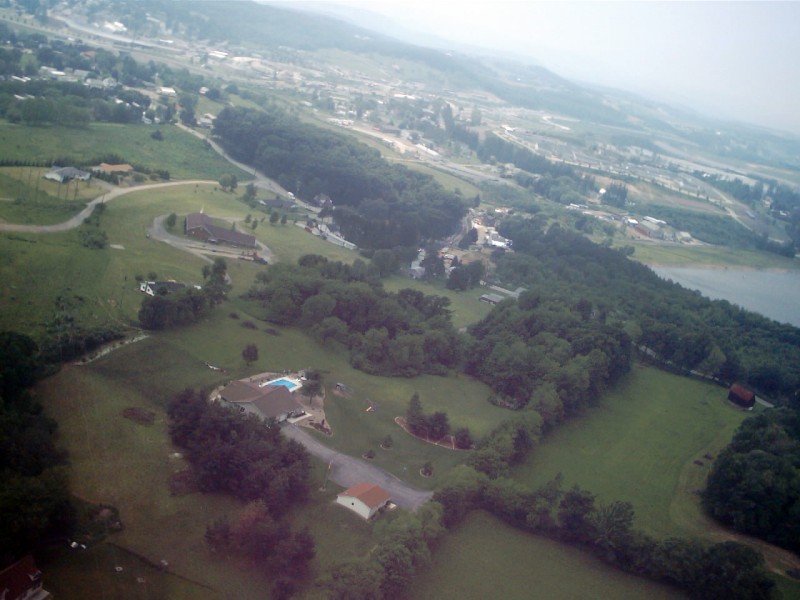
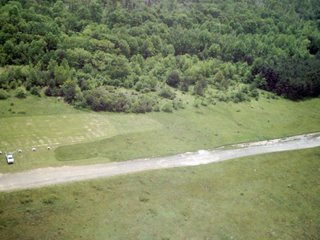
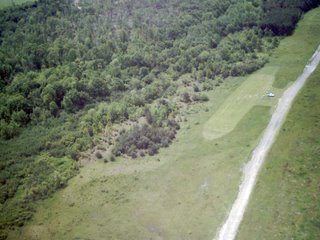
The aerial photos

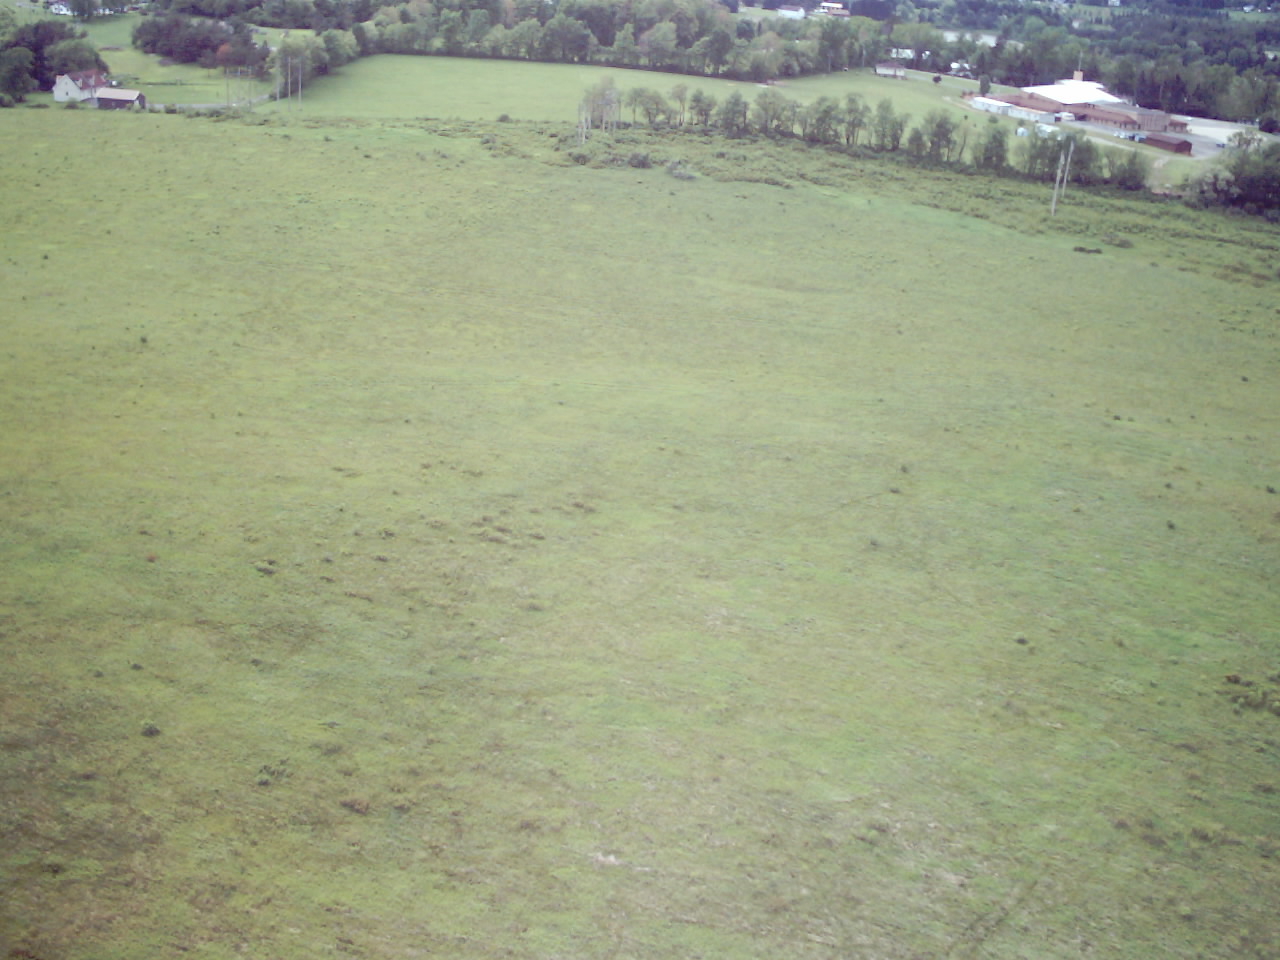

Here are the aerial photos taken from my Buhor 25. The one which shows our small field (and my white truck) was taken a few days ago. The other two where taken on the flight right before I lawn darted the Buhor 25. Not bad photos from a gaser spad with a cheapo 1.3 camera! Fun stuff!
Buhor 25+, my first SPAD
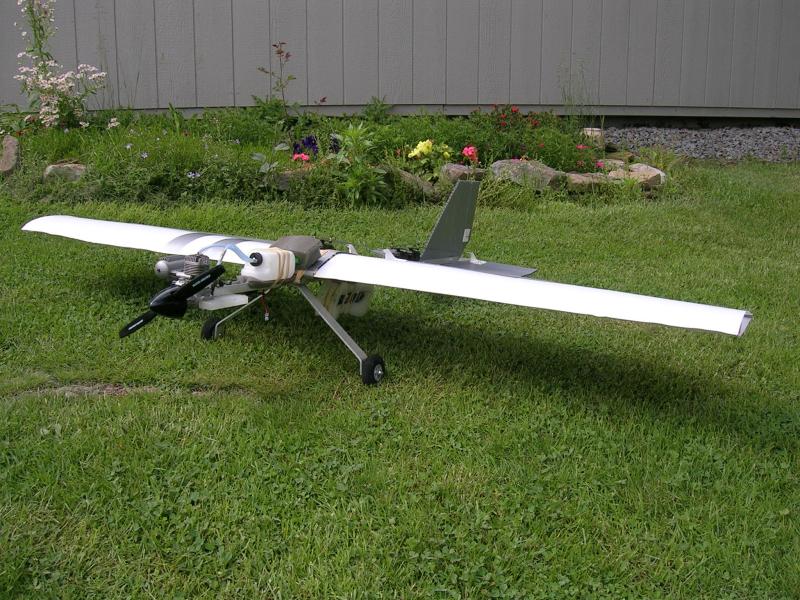

The Buhor 25 is my first SPAD. Plans can be found here Spadtothebone
Photo's of plane in the grass where taken today. The nice landing photo's of the red oak runway where taken a few days ago. Was my maiden flight and all was going well, or so I thought. Ended up over the trees and one thing lead to another and I managed to land her in a red oak tree... 60+ feet off the round. The long and short of it is, I have a friend that loves trees and has tree spikes. He climbed and then lowered her down with a rope. Poped one control rod and that was about it. Took all of a few minutes to fix and then it was back to flying!
Todays flying was short and not so sweet. First flight was nice... winds where pretty high but the Buhor with the os .40 la flew nice! Took a few photos which I am including. Second flight was ended rather soon, and badly. Took off, banked a bit right to get me headon into the wind, climbed to about 175 feet. Had an alerion control arm fail. Went into a death spiral and thought I had it recovered about 20 feet off the ground. NOT, it lawn darted into the soft ground breaking the prop, blowing all the wing rubbers and breaking loose two servos. Looked like a big mess.
But is is a SPAD!!! Less than an hour when I got home I had her flight ready minus the prop. Will pick a few of them up after work! man I love these SPADS!
Blue Devil is coming along...wing work.


My time has been limited last day or so. But I managed to get the wing layed out and then cut. Above are the photos. You will also notice the fuse Mike made for my demon. He is much more skilled at that than I am. Plus he has access to all the right tools :)
Saturday, June 03, 2006
Mike's Demon, the red devil?
Here is a photo of Mike's red Demon. Flys like it is on rails! Hope mine does also so we can have some combat action! Will be a pleasure cutting off this red devils tail!
Devil with a blue dress!
I am starting my spad "Demon" build. Fellow flyer Mike from my club told me that my demon had to be red. I told him I wanted to make my demon blue! He thought for a second and said, "so your making a Devil with a Blue Dress!" So there you have it, my Devil with a Blue Dress has begun. Plans for this plane can be found at http://www.spadtothebone.com/
Friday, June 02, 2006
Just getting started!
Well I am just getting started on my SPAD (Simple Plasic Aircraft Design) blog! I will be posting build pictures, flight pictures and what ever else I can post. May even get into some foam RC parkflyers. OH! And I will be posting Aerial Photography taken from my Radio Controlled model airplanes! Stay tuned!
Subscribe to:
Posts (Atom)


